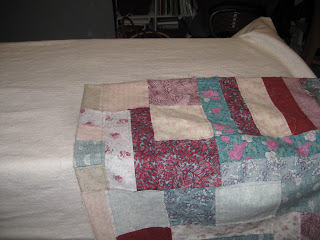
We have a small house and two inquisitive Corgis (not to mention a bad back and knees) so pinning a quilt on the floor is really not an option. In the past I've gone to my local quilt store to borrow their tables or set up on my pressing station (fabric covered), neither of which are ideal.
In setting up my sewing space, I moved my 'craft' table in and set in on bed risers (ideally it would not be set up full time but I've found numerous uses for it recently). First step was to fine the center of the table.
Once the center of the backing is lined up over my coffee stirers, it is time to clamp. The clamps are quite sturdy and also heavy. Do not drop on bare feet...
After clamping the backing, it is time to align the batting.
This is the point at which I realized that the hardware clamps are far less than ideal. Note the ridge of fabric at the edge of the table. This particular table has edges that are about 1.5 inches deep - thus the binder clips that I can use on my pressing table and on a standard banquet table don't work. During the office supply hunt, I learned that the large binder clip I brought along so that I wouldn't accidentally buy the wrong size is the largest commonly made. Sure, if I wanted to special order, I could get larger ones but the availability, and more importantly, the price was wrong.
Moving on, after smoothing the batting as best I can without stretching, I folded the quilt top into quarters and found the ridge of coffee stirrers to guide placement of the top.
The top was opened so that I could match the center along the center of the table.
Then opened all the way and gently smoothed out across the batting, being careful not to stretch. The rulers are placed along the edge of the coffee stirrers to provide a visual of the center of the quilt. And as I'm relatively certain of the center seam horizontally, I used that the ensure correct placement as well.
Overall, I'm not happy with the clamps. Not to mention at nearly $6.00 each, I can't afford a dozen of them. But I was determined to get the basting started and it was not until later that night that I came upon the suggestion to used picnic tablecloth clamps.
These things are great - they fit my table without slipping or popping off backwards - something I was concerned would happen if I forced the binder clips. And they are inexpensive - less than $3.50 for a pack of six at REI. (Might be cheaper elsewhere, but we were also shopping for the previously mentioned Scout bike trip.) Having 12 of them will allow me to better secure the next backing that gets sandwiched.
Coming soon - Pinning the quilt.


4 comments:
Picnic table clamps! Thank you for the great idea, I also have a thick table top and the binder clips won't fit. I shall try these.
Yep - something so simple... and much easier to store.
I read the reviews on a lot of styles and decided the metal ones would work best for me. I worry that I would break the plastic ones after a few uses.
The big clamps will go to the tool box, rather than hang out where I can stub my toe again.
This post and the previous one about the borders is very helpful. I like the coffee stirrers more than using toothpicks. The picnic tablecloth clamps is a very clever idea.
Yea for Gus. How proud you must be.
The coffee stirrers are a running joke with our Scouts. The Pack has over 1,000 of them in the camp trailer... so as a gag gift, we brought our Scoutmaster a package for use at Summer Camp last year.
I am thrilled for Gus. He is unstoppable.
Post a Comment