Monday, June 24, 2013

Coastal Pearls - String of Pearls Quilt-Along


 String of Pearls is a Quilt-Along organized by Christa at Christa Quilts.  I've chosen a charm pack by Moda called Ocean View for my pearls.

I'm following about a half step behind as the charm packs are 1/2 inch smaller than the directions given. Also, I prefer strip piecing the charms onto the accent strips - and then trimming rather pre-cutting the accent strips for the boxes.


The short strips fit eight charms each. So far I've used 5 and a quarter width of fabric navy strips.


The next step will be to cut these apart and press the first sides. Then on to the next 5.25 strips.

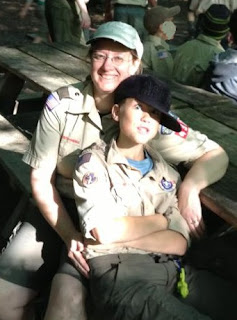
I took a break from quilting over the weekend and went to South Mountain State Park with our Boy Scout troop. We hiked about 10 miles up and down the mountains on Saturday.


Tuesday, June 18, 2013

Bits and Pieces

I'm in wrap-up and get started mode at the moment.  Last night, after an energizing guild meeting - the Durham Orange Quilt Guild, I came home inspired to at the very least finish my Fussy, Fiddly Threads Sampler. Sarah Ann Smith gave a fun and inspirational talk about her creative process.

 Step 1 - finish outlining the leaves and add some decorative quilting.


 This is very much a free-form project.  I broke the glitter thread two more times before figuring out that perhaps I needed to reset the tension on my machine. That allowed me to finally get those squiggles done.  I think my favorite thread on this project is the variegated.  It was fun to "paint" with it and see the leaves come to life. By the time I reached the last cluster, I decided to go even more free form and ignored some of the leaves that I originally sketched out.


So - even more energized at this point, I decided it was time to pick out the fabrics for the Aiming for Accuracy Quilt Along.  I started off with two color-ways in mind - a Red/Gold option or a Blue/White.  The recommendation is for 24 fat quarters - but that is as detailed as she gets.  My reds and golds are pretty evenly divided between regular and batik fabrics and I decided I didn't want to bother with mixing those in this project, so I pulled 21 different blues out of my stash.  The contrast (sashing) will be a white on white.  I will have to be careful of the placement of the heavily white & blue fabric (center front) so that it doesn't get lost against the sashing. I will probably add another navy and another dark blue.


I had completely forgotten about signing on for Christa's String of Pearls Quilt Along - and then found my set of charm packs again - so pulled together some coordinating fabrics for those as well. The striped backing is either a bed cover or table cloth that I found when I was helping clean my grandmother's house in February. That will be used as backing to make this into a picnic/beach appropriate quilt as it is a heavy fabric.


Finally, I decided I needed to play some with Mollie. I finished the vertical stitch in the ditch on the Sandy Breeze and still need to do some horizontal lines (I'm using water soluble thread so that I can practice and get a feel for how to maneuver the quilt without the stress of "perfection") and started to think about how I want to quilt these 15 inch blocks.  This little 5 inch stencil would get lost if I placed it onto each block, and I'm not sure I'm up to that many echo repeats to get it from 5 to 14 inches. I think instead that I will scatter these randomly around the center of the quilt.  I forgot to mark the quilt before basting it, so I may instead trace the design onto Golden Threads paper and unpin one section at a time to work on it.  Last night I proved to myself that I can follow the drawn line reasonably well, it will improve with practice, and my echo quilting isn't horrible - also room for improvement which I expect I'll see with practice.  This sample was done with the water soluble thread as I didn't want to unthread/rethread Mollie last night - so I will get much more mileage out of the sample sandwich.


Sunday, June 16, 2013

Learning to Work With Exotic Threads

On Saturday, June 15th, I had the pleasure of learning from Sarah Ann Smith - author of ThreadWork Unraveled.  She is the invited speaker at our Guild meeting this month and is giving two workshops over the weekend. Saturday was Tame Fiddly, Fussy Threads for Machine Quilting and Sunday/Monday is Quilting Design (which unfortunately because it is a 1.5 day class, I'm not able to attend).

 
The first part of the day was spent preparing the fabric for our project.  I chose to use the leaves provided in the class handout and to work with a blue/green colorway. We traced designs onto freezer paper and cut out the stencils then used paints to embellish the square for later quilting.  While the paint dried, Sarah discussed the importance of matching needles and threads and sorting out the tension.

I also learned a new cutting technique.  Using an 18 mm rotary cutter with the end tucked in my right palm, with my left index finger resting on the cutter above the blade to act as a break, it is possible to smoothly cut the stencils.  Clearly a picture would make more sense here, but that will have to wait a bit.

After lunch we started practicing with the threads to set the tension.  For each of the four threads, I marked in my lesson journal where I set the tensions. We used a 40 weight rainbow, a 30 weight solid, a silver metallic and a glitter. 

The silver and the glitter had the added challenge of being quite fine and easy to break.  Take home from the practice piece - if the tension is balanced and the thread still breaks, then the tension may be a skosh too tight.  We also learned about the effect of the fabric/needle friction on metallic threads.  When stitching for long periods of time, the needle heats up. This can cause the metallic thread to snap.  An easy fix it to take out the warm needle and set it aside (if it is not making a thunking noise then it is still a good needle) and replace with a cool needle.

Thread breaks can also be a function of using the wrong size needle with the chosen thread.  We reviewed the types of needs - Quilting, Ballpoint, Universal, Sharp, Topstitch etc.  Blown up on a large screen it is much easier to see the difference in the size of the eye.

Driving to class, just past the "point of no return" in terms of being able to turn back and get forgotten items from class, I realized that I didn't pack extra bobbin (inspiring me for future classes to make up a class kit with sewing basics), so I wound our bobbin threads in small amounts onto my one bobbin and tried to use them up - thus the extensive testing on my sample square.  I also tried out some leaf motifs.  Finally, I had to bite the bullet and push past my fear of not being perfect and start stitching.

I outlined and embellished the aqua leaves with the silver metallic thread and doodled with the glitter thread, until I ran out of bobbin thread - which coincided with the end of our class.  The glitter thread is mylar and VERY fragile. And a total pain to try to thread as it holds onto the curl from the spool.  Some rethreads were easy, others nearly impossible.  When it breaks it resembles a curly ribbon - so some has to be trimmed off.

I will outline and embellish the green leaves with blue thread and then add some leaves with the variegated thread and probably background quilt a bit with black.  Bobbin thread is polyester as that plays better in the sandbox with the glitter and metallic threads.

Friday, June 14, 2013

Mom Cave Update

 Just in time for a weekend being spent sewing away from the house (I'm participating in a guild workshop taught by Sarah Ann Smith this weekend -Tame Fiddly Fussy Threads for Machine Quilting), I have a useable work space again. It took several dedicated evenings and a good movie playing in the background to get here.  There are still some tweaks to make (and as long as I don't look behind me I'm happy) but I've got the basics sorted out.
 
There have been some substantial changes - the cutting/pressing station is now in the middle of the room - behind my sewing stations. And as mentioned before that space is now inhabited by my fabric hutch. Attempts at getting Command Strip hooks to stick have been variable. Periodically rulers slide to the floor - so I'm rethinking where some of these have been hung.  I am committed to not putting nails in the side of the hutch.

Some of the rulers are in the middle drawer. The largest will go onto nails on the wall (these don't fit in the drawers). It would be nice to have some of the most frequently used easily available.


Bernadette has been acting up recently, and I've learned more about foot control pedals than I expected to...  apparently the old 290 controller features a series of carbon disks inside a mechanism that affects how quickly the needle moves. Each time the disk is activated, a little bit burns away.  As this part is no longer readily available, I'll be on the lookout for a replacement pedal for both machines - fortunately they have the same plug/cord so both Bernadette and Penny can share a pedal.  For strip piecing, the rapid rate of stitching isn't a problem - but for detail work like applique, it is.


Mollie is now sporting an overlay which creates a smoother surface for maneuvering the quilt and utilizing rulers.


The broad overview. I can promise it won't be this clean tomorrow.  Next project is to get back to work on the Sandy Breeze so that I can get it turned back in to my guild.

Wednesday, June 5, 2013

Fabric Reorganization

I now have a beautiful hutch in my craft room to store fabric and other supplies.  I think we picked this out at Unfinished Furniture Express in 1995, and I did all the staining/polyurethaning myself. I also picked out the nifty hardware.  As Gus and I dusted and polished this on Memorial Day, I did ask myself why I didn't stain the backs of the doors or the back of the lower cabinet.  Ah youth...  well, it isn't happening now either I'm too busy organizing fabric.

For the past year or so, I've stored fabric in Rubbermaid Tubs. While spacious and supportive of my cutting/pressing station, it is not an ideal solution as I cannot easily see or access fabric. Which sometimes results in re-purchasing fabric. I will miss my wall of rulers - and considered not moving the hutch in here, but decided that was me being silly.  The sideboard is much happier in the dining room, than it would be in the middle of the living room (and Mike is happier too).

The first step was to measure the doors and shelves so that I could get the appropriate tubs for better
fabric organization. I found these at Walmart.  Not my favorite color for the handles, but I do like the clear containers better than the aqua/blue alternative (better color but pretty dark so harder to pick out the right box). I got the 3.5 and 6.5 inch deep boxes so that they can be stacked.

Next step is to decide on organization - 1/2 yard to about 1 yard cuts are folded and placed in the deep boxes. Scraps and fat quarters in the shallow boxes, with a few set aside for special projects.  I'm attempting by color, with a novelty box and a Christmas box as I have LOTS of holiday fabrics.  Larger cuts are wrapped around comic book boards for stability, and even larger cuts (think bolt ends) are flat folded and stacked at one side.

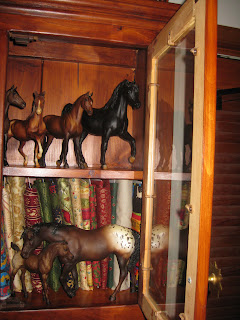
Gus is also having fun learning about another side of his Mom.  For the past 20 years, Dad has tried to send my Breyer horse collection home with me... and I've generally left it boxed in Tallahassee as we don't have room to display them here. However, my parents are trying to purge stuff, so that box, along with several others made it onto the behemoth.  Gus unwrapped my collection and handed it up to me. At first I was sure that I was short a box or two, but that box turned out to be similar to Mary Poppins carpet bag as horse after horse revealed itself. At one point Gus was convinced we had to be done, to which I assured him that based upon the incomplete family groups on the shelves there were at least 6 still in there... I need more shelves now. That is a project for June.


Sunday, June 2, 2013

Aiming for Accuracy Quilt-Along


Aiming for Accuracy Quilt-Along
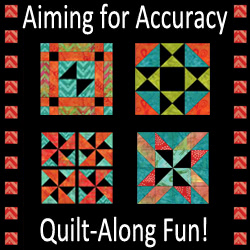
The Aiming for Accuracy Quilt-Along is starting up. The quilt is designed by Michele Foster at The Quilting Gallery Blog. Today she posted a picture of the finished quilt design along with the fabric requirements.  It will be a 16 week project, starting June 20th.  I am hopeful that I will have my Mom Cave back in shape by then so that I can spend some more regular time working on craft projects.  It looks like a fun summer project - especially as Gus will be out of the house for much of the summer at various camps and I won't be schlepping around to his various meetings and practices.

Now to pick 20-24 fabrics that work together!