Sunday, April 28, 2013

A Night in the Mom Cave - Preparing Batting Samplers

Step 1: Find Remote.
 The Mom Cave has gotten a little out of control recently.  Between finishing taxes and rearranging a bit, things got stacked instead of sorted and stored. To the left though, you can see the new work table arrangement. The craft table is now standing on a set of drawers to raise it by 10 inches, which puts it just about right for working while standing. If anything, it might be about an inch too tall. But as I'm planning to use it for basting and arranging, not cutting and pressing it should work out in the long run. I may add a few more drawers underneath it to better utilize the storage space.  Eventually the remote was found, not under a stack of fabric as I expected, but under the sewing desk.

Step 2: Insert appropriate movie.
Tonight's choice - Love Actually, starring Colin Firth, Hugh Grant, Kiera Knigtly, Liam Neeson, Alan Rickman and  Emma Thompson among others. A stellar cast and one of my favorites.  Not, however, a household favorite.


Step 2: Start pressing and cutting.
I spent the evening pressing and cutting the white muslin and navy backing for the batting samples.  The objective is a fourteen inch square for the front and a half white/half navy for the backing.  In an effort to best match my samples, I limited my cutting to the first 9 sets as I have two different cuts of white muslin and I'm pretty sure they are from different lots.  Each cut was halved and one half washed, the other set aside.


I don't have a 14 inch square ruler - so I used two rulers side by side - a 6.5 x 24.5 inch ruler is butted against the 10.5 inch square.  I first measured 7.5 inches in from the end using the square and added the additional 6.5 inches.  For the half strips the same procedure was used to add the extra inch for the 7.5 inch cut.  (The blue painters tape is left over from a previous exercise in squaring blocks - I used it as a visual reminder for the measurements.)


Step 4: Mark the center boxes.
The next step was to mark a 6 inch square in the center of the block. This center block will be used as a baseline to measure shrinkage as a result of quilting density. It will again be used as a gauge to measure how much overall shrinkage there is from washing.  The Gingher cutting mat has shaded squares in the center of it, which if you squint really hard are barely visible in the picture.


I used the shaded area as a guide for placing a 6.5 inch square ruler and traced the square using a pigma pen. I first traced the top and right side of the square. I then used the lines on the Omnigrid ruler to correctly place the ruler for the left and bottom lines.


The prewashed sets each have a P in one corner.  Once I sandwich the blocks, I'll also number each sample block according to whichever batting is in each.  The lines and letter P have been heat set.  After quilting and the initial measurement of shrinkage, I'll stitch along the square and the block ID in case of fading in the wash.  I learned from the signature quilt, that using starch on signature blocks carries a risk of fading. And there is a lot of starch on this fabric as the wrinkles on the pre-washed set were very well set.  The unwashed set still has the original sizing in it, so there may be a risk of fading on those blocks as well.

Next step is to pin the blocks - and pair them up.  At that point, I'll have plenty of samples ready for practicing free-motion quilting.  

Sunday, April 21, 2013

Batting Samples - Getting Organized

Dash on "ready alert" just in case something exciting happens... NOT!

It has been a lazy weekend around here. Not much in the way of quilting accomplished.  Dash and Monkey have been keeping me company.

Back in 2010, I ordered the Batting Samples that Harriet Hargrave put together, in order to do the Batting Test.  The samples arrived promptly, and just as promptly were stored with my fabric stash for 'future' use.  I have a few additional battings to try as well.

Today I pulled my dark and light fabrics, halving them and washing one set in order to start setting up the test squares. There are three squares of each batting - one to file in my sample book as it, one to sandwich in unwashed fabric and one to sandwich in prewashed fabric. Unfortunately, I miscalculated the number of 14 inch fronts and 7.5 inch backs (the other half of the back is the dark fabric) I would need for the white muslin, so I need to make another quilt store run to get a few more yards. {Big sacrifice on my part...} I found another length of cream muslin, but I'm pretty sure it is not quilt shop quality as specified in the Test instructions - based on the date on the tag, I think it was purchased to make the inner pouch for a set of planned dog beds.

The last set of fabric is in the dryer now, so this week I'll put together the sandwiches and pull out my pigma pens to create the center reference square (to measure contraction based upon the quilting) and also to label which batting is which.

Tonight I created a form based upon the Sample Test Sheet that Harriet designed so that I can enter the varied data and let the magic of forms/databases handle the organization.

Parallel to this project, I finally purchased a new laptop - those who saw my red Dell Inspiron know this is WAY overdue.  The hinges on the Inspiron started to break down about two and a half years ago - and for the last year or so, I've been propping the screen on a pillow or blankets as it was held on only by a few wires.  Last week though, Gus asked "what is that smell" about the time it blew a fuse and stopped working altogether.  I didn't force the issue as the smell appeared to be electrical in nature. Instead I pulled the battery and left everything on the stove so that there wasn't anything flammable nearby (probably overkill). Happily the hard drive is safe, and we were able to recover my data.

Monkey making sure she isn't missing anything.
I've spent the past few days getting used to the keyboard on my Lenovo Twist.  I chose the Twist as it can set up in a V - allowing me to watch quilting videos as I learn to free-motion quilt. Okay, so I really chose this one because it is both a laptop and a tablet - and just plain looked like fun to use. The keyboard is a bit annoying, and the screen is much smaller than my Inspiron. So while I like it, I'm not totally in love with it yet.  Typing this rambling post out is serving the purpose of helping me get used to the keyboard.  I don't have any of my pictures loaded yet, or music, so will be borrowing Gus's external drive in order to take care of that over the next few days.

Wednesday, April 17, 2013

Wahoo! NC Quilt Symposium


The Stars have aligned and I'm going to Symposium this year for the first time as a student!  I've been to the quilt show and vendor mall twice in the past few years, when it has been within driving distance (okay, so Charlotte really isn't a day trip, but it is a great excuse to visit my sister).

I received official confirmation earlier this week that I am enrolled in my two first choice classes!

On Friday, I will spend the day with Sandy Fitzpatrick in No Fear Free Motion Quilting. I am looking forward to learning and improving my FMQ.  More incentive to practice prior to attending so that I can get more out of the class. 

On Saturday, I will spend the day with Harriet Hargrave (yes you are reading that right!) in Invisible Machine Applique.  I am particularly excited about finally meeting Harriet.  When I learned she would be teaching, I was really hoping that she would be teaching Heirloom Machine quilting, but that was not an option here. I didn't learn that she would be in our neck of the woods (well a 5 hour drive versus flying) at Mountain Quiltfest until after her classes there were completely full.  I've not done much applique in the past so I'm looking forward to this workshop as well. I've already finished reading Mastering Machine Applique (twice).  We were instructed to indicate which course was our first-first-first choice in order that everyone have a chance to get into at least one of their first choice classes over the weekend - so I highlighted and double starred it.

I do find it amusing that I'm taking a free motion quilting course from a teacher known for her applique and an applique course from the fairy godmother of machine quilting...

There is an incredible array of talent teaching at Symposium this year (Kaye England, Sharon Schamber, Susan Brubaker-Knapp and Augusta Cole to name a few). So picking just two courses was not easy.

Monday, April 15, 2013

2nd Quarter Finish-A-Long

I recently discovered Finish-A-Longs - what a great way to cheer on others who are working with UFOs.

she can quiltLeanne at She Can quilt is hosting one, and the deadline to enter is midnight tonight. Just sneaking in under the wire for my first one.

Now to pick which projects I can reasonably complete.  The primary rule I see is that it must be already started - so the PSSIMH are out (those are "projects still stuck in my head"). June 30-July 7 is the target for completion - so let me be reasonable.

First up - one that Gus is begging me to finish before he graduates high school (he is in the sixth grade, so there might be a touch of the dramatics happening...) is Gus's Dragon Quilt.


The top is pieced but the borders are not attached yet. There will be several including a pieced border. This one scares me a little because I like it so much and my quilting skills are beginner at best. Gus helped me design this in terms of laying out the dragon colors.

Quilt number 2:  Let's see what I can do with the Dr. Seuss Log Cabin.  Originally intended as a gift for my youngest nephew as an infant, he is now 2...


I think this top is done. I tried out a few ideas for borders, but like it as it is.  The backing is the black & white Dr. Seuss scatter.  Not sure what I'll bind it in just yet.  I auditioned a rainbow strip and did not like it. I'm not sure if I could find enough of the red dot, but that is the way I'm leaning as I look at this one again.

Quilt 3:  Another that needs borders. French Rail Fence.

I have a few different ideas for the borders. I may add some applique for additional interest - perhaps a large Fleur-de-lis or a cluster of lilies.  Not sure how I want to quilt it just yet. It will be a lap quilt when done.

Quilt 4: My first top - Floral Wonderland.  Therefore my oldest UFO.

I am hopeful that I have enough of the red in my stash for either a narrow border or for the binding. The daisy fabric will be the wider border. Not sure how to quilt it yet.

Okay - I'm going to leave it at 4 for this quarter. And I'll be thrilled if I can get them all completed.

Friday, April 12, 2013

Pinning with Pinmoors

There are a variety of products you can use to baste a quilt - my preference is Pinmoors.


Quick disclaimer - I am a satisfied customer, I have no financial stake in Pinmoor, though I have met the creator at a Quilt Show and she is quite nice.

I am not a fan of safety pins - I don't like fastening them and I don't like unfastening them. I know that there is a nifty tool - the Kwik Klip that people rave about; however, given the frequency with which I misplace tools, I would spend more time looking for it than using it to fasten and unfasten the pins. I'm not the most coordinated person out here and I don't want to spend all my time manipulating the pins.

I am also not a fan of adhesives - especially spray adhesives - I don't handle perfumes well, so something like the 505 spray is not an option for me. I'm also not sure I'm coordinated enough to try using Elmer's glue. Thus I prefer using my stash of straight pins.

Using the Pinmoor is a two step process for me - stick the pin through the fabric and lift the end slightly.
Stick the Pinmoor in place and make sure it is on securely.

Be careful not to stab yourself (and keep band aids handy).


I do not stop to add the Pinmoor with every pin - instead I'll put in a dozen or more pins and go back to add the Pinmoors. There is a risk of missing one (note recommendation on keeping band aids nearby), but it goes faster for me if I'm not stopping to add the Pinmoor each time.

Using the table method described in the previous post, once the center of the quilt is pinned, then it is time to unclamp the quilt sandwich and move it over.  The weight of the pinned portion of the quilt hanging off one side is sufficient to provide a taut surface.

I flipped the unpinned portion of the sandwich over while clamping the backing (using my new handy-dandy picnic tablecloth clamps) and then smoothed the batting and the quilt top towards me - gently again to avoid stretching.  Once that side is finished, repeat the process for the other side.

Overall, I'm much happier using this table than the previous set-ups. However, I did notice while pinning seemingly endlessly that the table is still about 6 to 8 inches lower than idea.  It is currently sitting on a set of bed risers.  However, that is not steady enough to trust to an additional set of bed risers.  I had planned to use the trick of sliding the legs into PVC pipe - but that works on tables with a bend in the legs - which this one does not have, so I'm trying to figure out what to try next. Perhaps boxes of fabric?

Another important caution/safety note.  While I generally keep my shoes on around the house (plantar fasciitis worries), when I'm sewing I'm frequently barefoot as I find I have better control over the foot pedal.  I stepped on my first pin recently.  It was not a loose one. It was in the border of the quilt that had reached the floor. Just something else to be aware of...

My usual MO is to skimp on pins. I don't think I've done that on this quilt - judging by the Pinmoors left in the bowl, I am closing in on 300 pins... this is slightly larger than a lap quilt, but not a bed quilt.


The Breeze is now ready to be quilted.  I've played with a few ideas in my head.  The batting is Warm and Natural which gives me more flexibility in terms of the density of the quilting. I'm leaning towards ruler work, outlining the blocks, but not stitch in the ditch.  It would be nice to turn this in at our April Guild meeting.

Removing the pins while quilting is straightforward and I keep two bowls nearby while quilting - one gets the pin dropped in it (if I don't have the magnetic pin keeper nearby) and the other gets the Pinmoor. Periodically, with the cheap yellow-topped pins, the yellow ball pops off and the pin stays in the Pinmoor. I slide the pin shaft out and drop it into the bowl of Pinmoors so that later I can deal with wiggling the pin shaft out and discarding that in my sharps jar (an old spice jar with a hole pounded in the lid). Eventually I'll upgrade all my pins to a higher quality.

Tuesday, April 9, 2013

Basting the Breeze - The placement of the layers.

Probably my least favorite part of the quilting process is the basting of the quilt. Therefore, this post will be very picture intense.

We have a small house and two inquisitive Corgis (not to mention a bad back and knees) so pinning a quilt on the floor is really not an option.  In the past I've gone to my local quilt store to borrow their tables or set up on my pressing station (fabric covered), neither of which are ideal.

In setting up my sewing space, I moved my 'craft' table in and set in on bed risers (ideally it would not be set up full time but I've found numerous uses for it recently).  First step was to fine the center of the table.

 
  Next - the center of the backing.
Once the center of the backing is lined up over my coffee stirers, it is time to clamp. The clamps are quite sturdy and also heavy. Do not drop on bare feet...
After clamping the backing, it is time to align the batting.
This is the point at which I realized that the hardware clamps are far less than ideal. Note the ridge of fabric at the edge of the table. This particular table has edges that are about 1.5 inches deep - thus the binder clips that I can use on my pressing table and on a standard banquet table don't work.  During the office supply hunt, I learned that the large binder clip I brought along so that I wouldn't accidentally buy the wrong size is the largest commonly made. Sure, if I wanted to special order, I could get larger ones but the availability, and more importantly, the price was wrong.
Moving on, after smoothing the batting as best I can without stretching, I folded the quilt top into quarters and found the ridge of coffee stirrers to guide placement of the top.
 The top was opened so that I could match the center along the center of the table.
Then opened all the way and gently smoothed out across the batting, being careful not to stretch.  The rulers are placed along the edge of the coffee stirrers to provide a visual of the center of the quilt. And as I'm relatively certain of the center seam horizontally, I used that the ensure correct placement as well.

Overall, I'm not happy with the clamps. Not to mention at nearly $6.00 each, I can't afford a dozen of them.  But I was determined to get the basting started and it was not until later that night that I came upon the suggestion to used picnic tablecloth clamps.
These things are great - they fit my table without slipping or popping off backwards - something I was concerned would happen if I forced the binder clips. And they are inexpensive - less than $3.50 for a pack of six at REI. (Might be cheaper elsewhere, but we were also shopping for the previously mentioned Scout bike trip.)  Having 12 of them will allow me to better secure the next backing that gets sandwiched.

Coming soon - Pinning the quilt.


Sunday, April 7, 2013

Borders and More

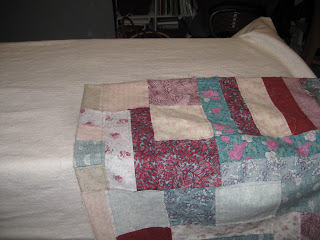
The borders are on.


I used this opportunity to practice measuring and applying borders as described in Class 180, lesson 3.  However, doing this from memory, I will admit to skipping lesson 1 on squaring the quilt.  Measurements fortunately show the quilt fairly close to even - less than 1/4 inch difference.

The key of course is to measure carefully - across the center (in each direction) and also to remember the measurement.  One must also be careful not to stretch the measuring tape or the quilt top (I may have done so while measuring the quilt as it hung on the closet doors - I remeasured on the table).

This is the largest quilt I've worked on so far, and I don't have an accessible table to lay it flat, so I folded it in half to remeasure, especially as borders were added.  It is easier for me working with a larger quilt if Gus is available to hold one end of the measuring tape.

Another tip that shouldn't need to be mentioned is to write the measurements down...  makes computations along the way much easier - especially if strips need to be joined.

A tip I read online that I plan to use for the next quilt is to use adding machine tape in the length of the desired border to help with accuracy.  It may be a bit redundant, but being a visual and tactile learner, I think it will help me - and has the added benefit of being a handy place to write down my computations.

So - once the borders are measured and cut (1/2 inch longer than the measurement to allow for room to square the corners at each addition - as recommended by Harriet and Carrie), the center of the quilt and the center of the border are matched up - I place a pin at both centers so that I can match up by feel.  Next the ends of the border are pinned down - remembering to leave 1/4 inch past each edge.

Now comes the fun part - one could say that we apply Zeno's Paradox of Dichotomy. Or not (yes, I'm a bit of a geek).  A pin is placed halfway between the center and then end, and then halfway between the quarter point and the end - and so forth in each section depending on how many pins you wish to use and how much easing of the quilt versus the border needs to be done to match the length of the quilt edge to the border length.

This process is repeated for each pair of borders until all are on.

Now - for the MORE.

This past weekend Gus and I traveled with his Scout troop to Damascus, VA to camp near the Virginia Creeper trail.  While I rode the 17 miles from White Top, down the mountain to our campsite in Damascus, Gus and 5 friends (and 5 leaders) cycled on to Abingdon and then back to Damascus - to complete a 50 mile ride.  For the cycling merit badge, the Scout must complete a 50 mile ride in under 8 hours. Gus and his friend Evan were the youngest doing the 50 miles this year and did complete in 7 hours 54 minutes.  I won't deny a little stress as the clock closed in on 8 hours from their departure.

This is the face of triumph!


Monday, April 1, 2013

The Trouble with Tribbles

Or perhaps a Flurry of Fleece?

Over the Thanksgiving holidays I fell prey to the wondrous advertising magic of 50% off (and sometimes even better pricing) on fleece (as low as $2.99/yard) and ordered 30 yards of fleece - envisioning fleece blankets for all!  Cue Hoarder theme music...  Some was ordered as backing for fleece panels we already have, and some was used on patterned fleece I ended up picking up locally when the online source sold out early - suffice it to say A LOT of fleece entered my house!  A few yards left in a timely manner, fashioned into blankets. And a few more was cut up for other projects... but there is still A LOT of fleece in my house.

In a flurry of activity, I started "finishing" projects in order to move this stuff OUT.

Scarves for the Hockey Moms - cut and pinned at Boy Scout meetings (gotta use time - and tables - wisely), and then sewn together before the MLK Weekend Tournament was finally trimmed into fluffy scarves and distributed at the St. Patrick's Day tournament.  Poor timing on my part as only 6 of us diehard Moms were there in the stands. I was prepared for a dozen or more, so I'm ready for next season.

And the big hit - HATS.  The pattern I used is a 10 minute (ha) hat, with one seam. I modified it a bit, and added a seam to anchor the brow a bit.  When asked how long it took the answer was 15 hats in 2 hours... however, the first four hats that I made before Christmas also took 2 hours.

For both of the hats and the scarves, I found it much easier to use my rotary cutter to make the fringe versus using scissors.  The Spring Loaded scissors do reduce hand fatigue, but finding a comfortable position to cut while sitting in the car was not a success.  On the other hand, standing and cutting (for most of the scarves, I was able to use the counter at Gus's Boy Scout meeting) leads to back pain. In both cases, I recommend taking a break and walking around.

I'm happy to say that both the hats and scarves were a hit with the team.

And even better - I'm happy to say that the PeeWee Sharks WON the tournament!

This is Gus, all the way to the left.