My One Monthly Goal for February was to finish and gift both quilts. This meant I had a deadline of getting everything quilted and the binding attached by February 16 as I was travelling for the rest of the month. I am happy to report that I met my goal and presented the quilts to two very happy nephews on February 25th. This is a photo intensive post! This also adds two finishes from my Projects Half Done!
My first thought was, I can do this from my stash. Ummm NOPE! Too much fun to shop for fabric. My older nephew is an Orlando Magic Fan! So much so that his walls are painted in the magic colors and a giant logo is above his bed. It was a no brainer once I found the Orlando Magic fabric and ordered almost enough to make a quilt back (see above comment about making things bigger).
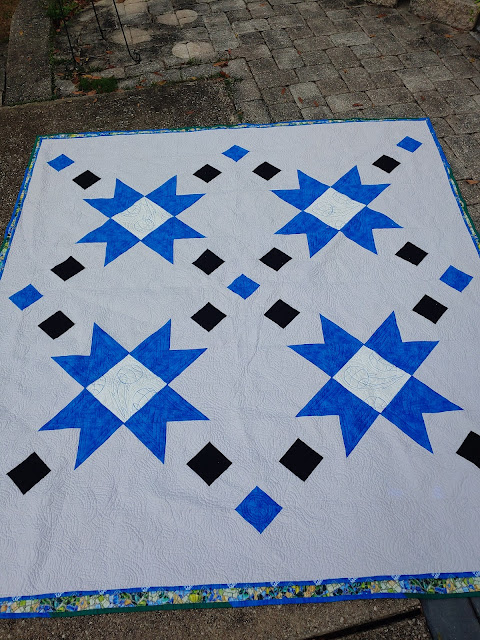
My younger nephew is a renaissance man in the making - he is into computers, video games, tennis, soccer and plays the steel pan (drum) and the trumpet! When I found the mosaic fabric at a short bolt sale, I confirmed with my sister that he likes blue and green as it kind of reminded me of Minecraft. For some reason I thought his school colors were blue and green, but I was wrong. I started piecing the quilts in April and into May and completely finished the blue/green quilt. The Orlando Magic quilt languished in the quarters for several months until I got myself back in gear in January.
I had to be creative with the backings as I extended the quilt with a pseudo border that completed the blue squares along the edge.
I used the bonus triangles from the star points to create center strips for each back.
Pressed and ready to pin. I started with the Orlando Magic quilt as I had a better idea of how I wanted to quilt it.
The Magic back. I have a tough enough time sewing a long straight seam, so imagine my frustration when I realized I sewed this strip to the wrong side of the fabric and had to rip and resew a 96 inch seam!
I decided to echo quilt the star points to look like a repeating M.
The background is McTavished and there are basketballs in the blue and black squares. The tricky part was the star centers.
I knew I wanted to try to replicate the Orlando Magic logo in the centers. So I went back to using the Golden Threads paper so that I could make identical logos. I should have just sketched each one as they all came out a little different.
After I removed the paper, I echo quilted to add more texture.
The Magic quilt has been washed, the Renaissance Man quilt had not been washed yet - thus appears bigger.
My original plan to bind was to wrap the Orlando Magic fabric from back to front. Unfortunately, while trying to trim away the batting, I sliced the back on my second cut, so I practiced my machine binding as I knew I wasn't going to have time to hand stitch binding on two bed quilts this month. I am happy to report that I did not at any time have to unpick backing fabric from my quilting as I managed to keep the excess fabric out from under the needle.
Moving on to the Renaissance Man quilt.
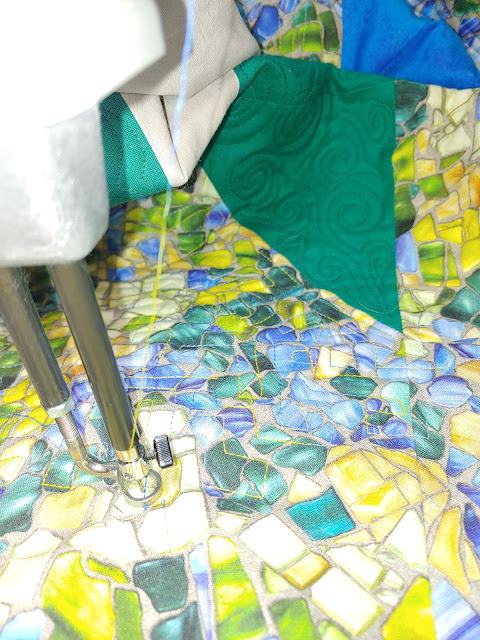
I chose a variegated thread for the background quilting on this one and as I wound bobbins realized that based on the number of bobbins, I did not have enough thread. So a quick trip to Greensboro later, I still didn't have enough thread as they were sold out of the color I needed. Thankfully Wonderfil shipped promptly and the thread arrived in time for me to finish the quilt. These are heavy and I did not want to ship them.
While I avoided quilting the backing into the quilt along the edges again, I did not avoid hitting pins and sewed through not one by THREE pins. Something about this fabric had my pins blending in a bit too well. Thankfully I didn't break a needle or screw up timing. I did become adept at changing needles.
I tried to create a circuit board effect in the background of the quilt using a squared off meander. It was more fun that a curved meander for me. A little hard to photograph as the variegated thread blends quite well.
For the star points, I used a combination of swirls and smoky swirls.
You can get a better sense of the circuit board looking from the back.
After creating the four center motifs - I stippled around to create texture in the star centers. Each of the centers represents an interest of my younger nephew.
Binary code for the programmer, and a tennis racket and balls were fun to create.
I'm especially pleased with my steel pan and you can also see the continuous curve/swirl motif I used in the small squares.
Next step was binding. For some reason, the decision escapes me now, I decided to alternate the to dark colors on the binding. I created about 36 feet of binding. I am please to report that of my 21 joins to create the binding, I didn't sew any to the wrong side!

All pressed and ready to attach. I did this while waiting for the spool of thread to arrive. As mentioned above, they shipped promptly, so I was able to start finishing the background on Saturday instead of Monday. A good thing too as I likely would have needed to pull an all-nighter if it had arrived when tracking said it would. I had a lot of thread breaks using variegated thread. I did not have a comparable amount using a solid color of the same brand.
I decided I would go ahead and machine bind this one, so sewed the binding to the back of the quilt. Then decided I needed to hand stitch this one due to the color changes in the binding. Fortunately that is a portable task and was accomplished in a variety of locations during my vacation.
I had fun creating labels for each quilt - and these got created and stitched on on Thursday afternoon, just in time for the Friday presentation.
The boys are happy and the smiles say everything.

To me, this is upside down - but if this is the side he prefers this is how he should use it. I was questioning all that gray on the front of the quilt by the time I finished quilting and lint rolling it.
This is why we do what we do! I think Sean may use his quilt as an excuse to get a bigger bed now.
Linking to:
One Monthly Goal - Elm Street Quilts - Goal met!
PhD in 2022 - Quilting Gail - 2 Quilts completed this month (4 complete for the year)
Fabrics purchased at Calla Lily Quilts and JoAnne Fabrics
Pieced using Prescencia 60/3 on my Bernina 840 Record.
Quilted using a combination of Wonderfil, Aurifil, and Connecting Threads 50 weight thread on my Sweet Sixteen.


1 comment:
Fantastic quilt finishes!!! I LOVE the quilting on the blue & white one! Awesome!
Congratulations on finishing 4 quilts so far this year!!!
Thanks for Linking to the PHD in 2022!
Post a Comment